Deploy SpiceDB to Amazon ECS
Amazon Elastic Container Service (ECS) is a fully managed container orchestration service that simplifies your deployment, management, and scaling of containerized applications. This blog will illustrate how you can install SpiceDB on Amazon ECS and is divided into 3 parts:
- A quickstart guide - Intended as a learning exercise
- A prod-friendly CloudFormation template
- Limitations of using Amazon ECS as a deployment target for SpiceDB
It's important to note that this guide is meant for:
- You want to learn how to deploy SpiceDB with Amazon ECS
- Your current infrastructure is on Amazon ECS and you want to create a Proof of Concept with SpiceDB.
It is not recommended to use SpiceDB on ECS as a production deployment target. See the final section of this post for more details.
Here are the prerequisites to follow this guide:
- An Amazon Web Services (AWS) account with relevant permissions
- AWS CLI
- The zed CLI (this is optional if you’re writing permissions via code
- Docker installed on your system
Quickstart
Let’s start by pushing the SpiceDB Docker image to Amazon Elastic Container Registry (ECR)
Push a SpiceDB Image to Amazon ECR
Create an ECR Repository Using the AWS Console
- Go to the ECR Console in the AWS Management Console.
- Click on Create repository.
- Enter a name for the repository, like spicedb, and configure any settings (like image scanning or encryption).
- Click Create repository to finish.
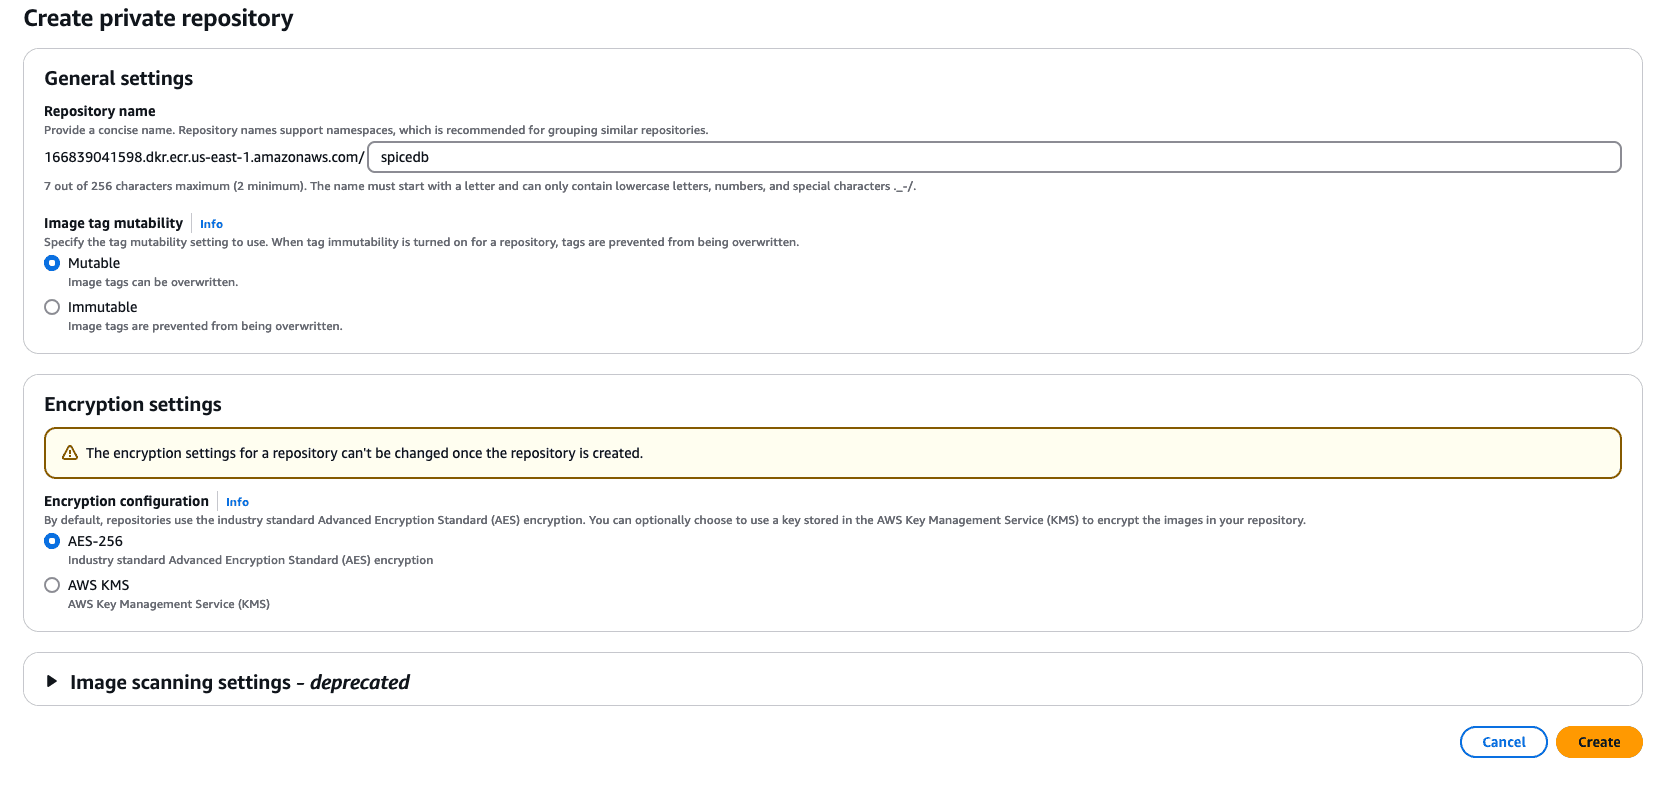
Alternately, you can create this using the AWS CLI with the following command:
aws ecr create-repository --repository-name spicedb --region <your-region>
Authenticate Docker to Amazon ECR
Amazon ECR requires Docker to authenticate before pushing images.
Retrieve an authentication token and authenticate your Docker client to your registry using the following command (you’ll need to replace region with your specific AWS region, like us-east-1)
aws ecr get-login-password --region <region> | docker login --username AWS --password-stdin <account-id>.dkr.ecr.<region>.amazonaws.com
Tag the Docker Image
- Pull and build the SpiceDB image from Docker Hub using this command
docker pull authzed/spicedb:latest
docker build -t spicedb .
- After the build completes, tag your image so that you can push it to the ECR repository.
docker tag spicedb:latest <account-id>.dkr.ecr.<region>.amazonaws.com/spicedb:latest
Note: If you are using an Apple ARM-based machine (Ex: Mac with Apple Silicon) and you eventually want to deploy it to a x86-based instance you need to build this image for multi-architecture using the buildx command.
You cannot use docker buildx build with an image reference directly.
Instead, create a lightweight Dockerfile to reference the existing image by adding this one line:
FROM authzed/spicedb:latest
and save it in the directory. While in that directory, build and push a Multi-Architecture Image using the buildx command:
docker buildx build --platform linux/amd64,linux/arm64 -t <account-id>.dkr.ecr.<region>.amazonaws.com/spicedb:latest --push .
Push the Image to ECR
- Once the image is tagged, push it to your newly-created ECR repository:
docker push <account-id>.dkr.ecr.<region>.amazonaws.com/spicedb:latest
Replace account-id and region with your AWS account ID and region.
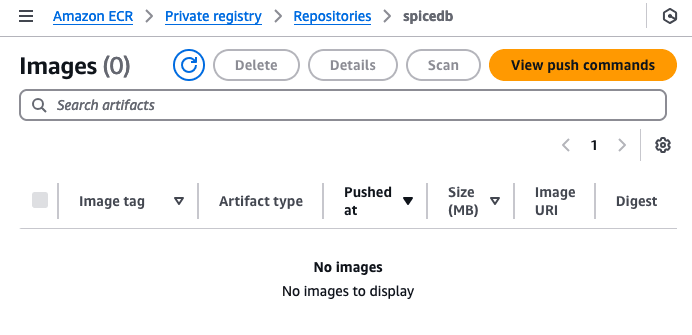
- Go to the Amazon ECR Console and navigate to the
spicedbrepository. Verify that thespicedb:latestimage is available.
Note: All the above commands are pre-filled with your account details and can be seen by opening your repository on ECR and clicking the View push commands button
Run a SpiceDB task in an ECS Cluster
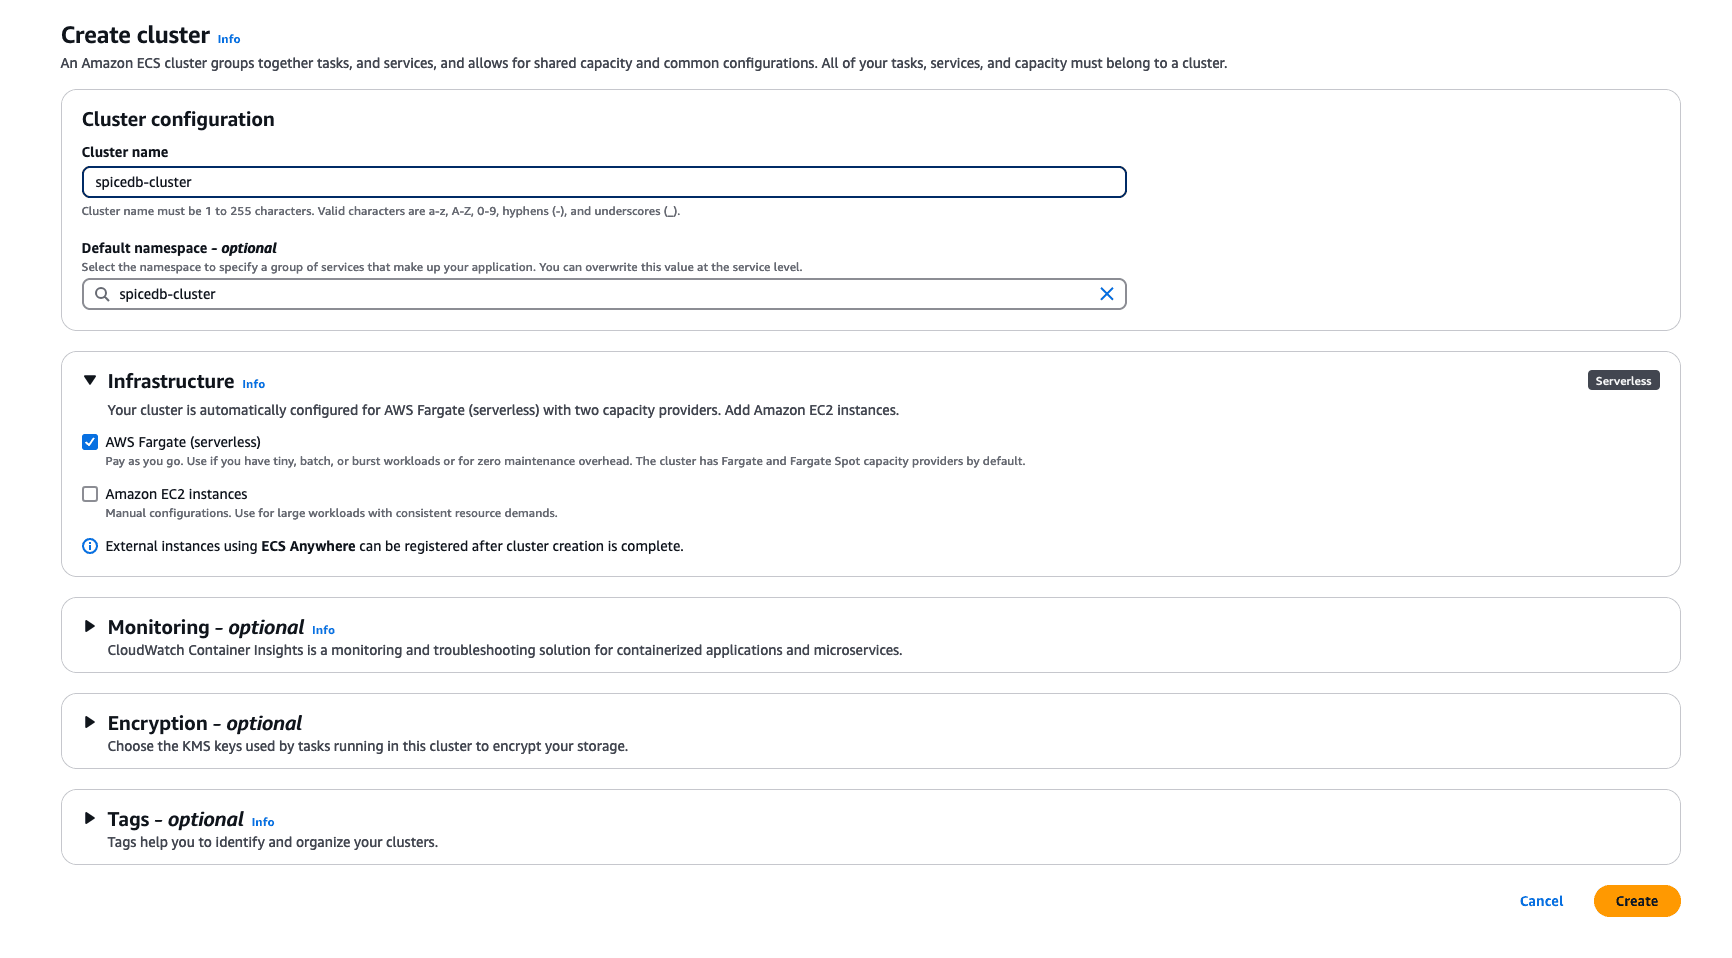
Create an Amazon ECS Cluster
Using AWS Console:
- Go to the ECS console and click ‘Create cluster’
- Give it a name and namespace (optional)
- For this guide, we will use ‘AWS Fargate (serverless)’ as the infrastructure for our cluster
Alternately, you can create this using the AWS CLI with this command:
aws ecs create-cluster --cluster-name spicedb-cluster
Create IAM Roles (if they don’t exist)
If you don’t see these roles, you can create them as follows:
Creating ecsTaskExecutionRole:
The ECS Task Execution Role is needed for ECS to pull container images from ECR, write logs to CloudWatch, and access other AWS resources.
-
Go to the IAM Console.
-
Click Create Role.
-
For Trusted Entity Type, choose AWS Service.
-
Select Elastic Container Service and then Elastic Container Service Task.
-
Click Next and attach the following policies:
- AmazonECSTaskExecutionRolePolicy
Or use these commands using AWS CLI:
aws iam create-role --role-name ecsTaskExecutionRole

--assume-role-policy-document '{"Version": "2012-10-17", "Statement": [{"Effect": "Allow", "Principal": {"Service": "ecs-tasks.amazonaws.com"}, "Action": "sts:AssumeRole"}]}'
Attach the AmazonECSTaskExecutionRolePolicy to the role:
aws iam attach-role-policy --role-name ecsTaskExecutionRole

--policy-arn arn:aws:iam::aws:policy/service-role/AmazonECSTaskExecutionRolePolicy
Creating ecsTaskRole (Optional):
The ECS Task Role is optional and should be created if your containers need access to other AWS services such as Amazon RDS or Secrets Manager.
- Go to IAM Console and click Create Role.
- Choose Elastic Container Service and then select Elastic Container Service Task as the trusted entity.
- Attach any necessary policies (such as SecretsManagerReadWrite or other policies based on your application’s needs).
- Name the role ecsTaskRole and click Create role.
Or use these commands using AWS CLI:
Create the role using:
aws iam create-role --role-name ecsTaskRole

--assume-role-policy-document '{"Version": "2012-10-17", "Statement": [{"Effect": "Allow", "Principal": {"Service": "ecs-tasks.amazonaws.com"}, "Action": "sts:AssumeRole"}]}'
Attach any policies based on the specific AWS services your application needs access to:
aws iam attach-role-policy --role-name ecsTaskRole

--policy-arn arn:aws:iam::<policy-arn-for-service-access>
Define the ECS Task Definition
The task definition defines how SpiceDB containers will be configured and run. Below is the JSON configuration for the task definition. To create a task definition:
-
AWS Console
- Look for Amazon ECS and then click on Task Definitions on the left
- Click Create new task definition -> Create new task definition with JSON
Copy the JSON below:
{
  "family": "spicedb-task",
  "networkMode": "awsvpc",
  "requiresCompatibilities": ["FARGATE"],
  "cpu": "512",
  "memory": "1024",
  "executionRoleArn": "arn:aws:iam::<account-id>:role/ecsTaskExecutionRole", //Copy the ARN from the ecsTaskExecutionRole created above
  "taskRoleArn": "arn:aws:iam::<account-id>:role/ecsTaskRole", //Copy the ARN from the ecsTaskRole created above
  "containerDefinitions": [
    {
      "name": "spicedb",
      "image": "<account-id>.dkr.ecr.<region>.amazonaws.com/spicedb",  //ECR Repository URI
      "essential": true,
      "command": [
                "serve",
                "--grpc-preshared-key",
                "somekey"
            ],
      "portMappings": [
        {
          "containerPort": 50051,
          "hostPort": 50051,
          "protocol": "tcp"
        }
      ],
      "environment": [],
      "logConfiguration": {
        "logDriver": "awslogs",
       "options": {
                    "awslogs-group": "/ecs/spicedb-ecs",
                    "mode": "non-blocking",
                    "awslogs-create-group": "true",
                    "max-buffer-size": "25m",
                    "awslogs-region": "us-east-1",
                    "awslogs-stream-prefix": "ecs"
                }
      }
    }
  ]
}
The command section specifies serve which is the primary command for running SpiceDB.
This command serves the gRPC and HTTP APIs by default along with a pre-shared key for authenticated requests.
Note: This is purely for learning purposes so any permissions and relationships written to this instance of SpiceDB will be stored in-memory and not in a persistent database. To write relationships to a persistent database, create a Amazon RDS instance for Postgres and note down the DB name, Master Password and Endpoint.
You can add those into the task definition JSON in the command array like this:
"command": [
                "serve",
                "--grpc-preshared-key",
                "somekey",
                "--datastore-engine",
                "postgres",
                "--datastore-conn-uri",
                "postgres://<username>:<password>@<RDS endpoint>:5432/<dbname>?sslmode=require"
            ],
The defaults for username and dbname are usually postgres
You can also use the AWS CLI by storing the above JSON in a file an then running this command
aws ecs register-task-definition --cli-input-json file://spicedb-task-definition.json
Run the task in a ECS Cluster
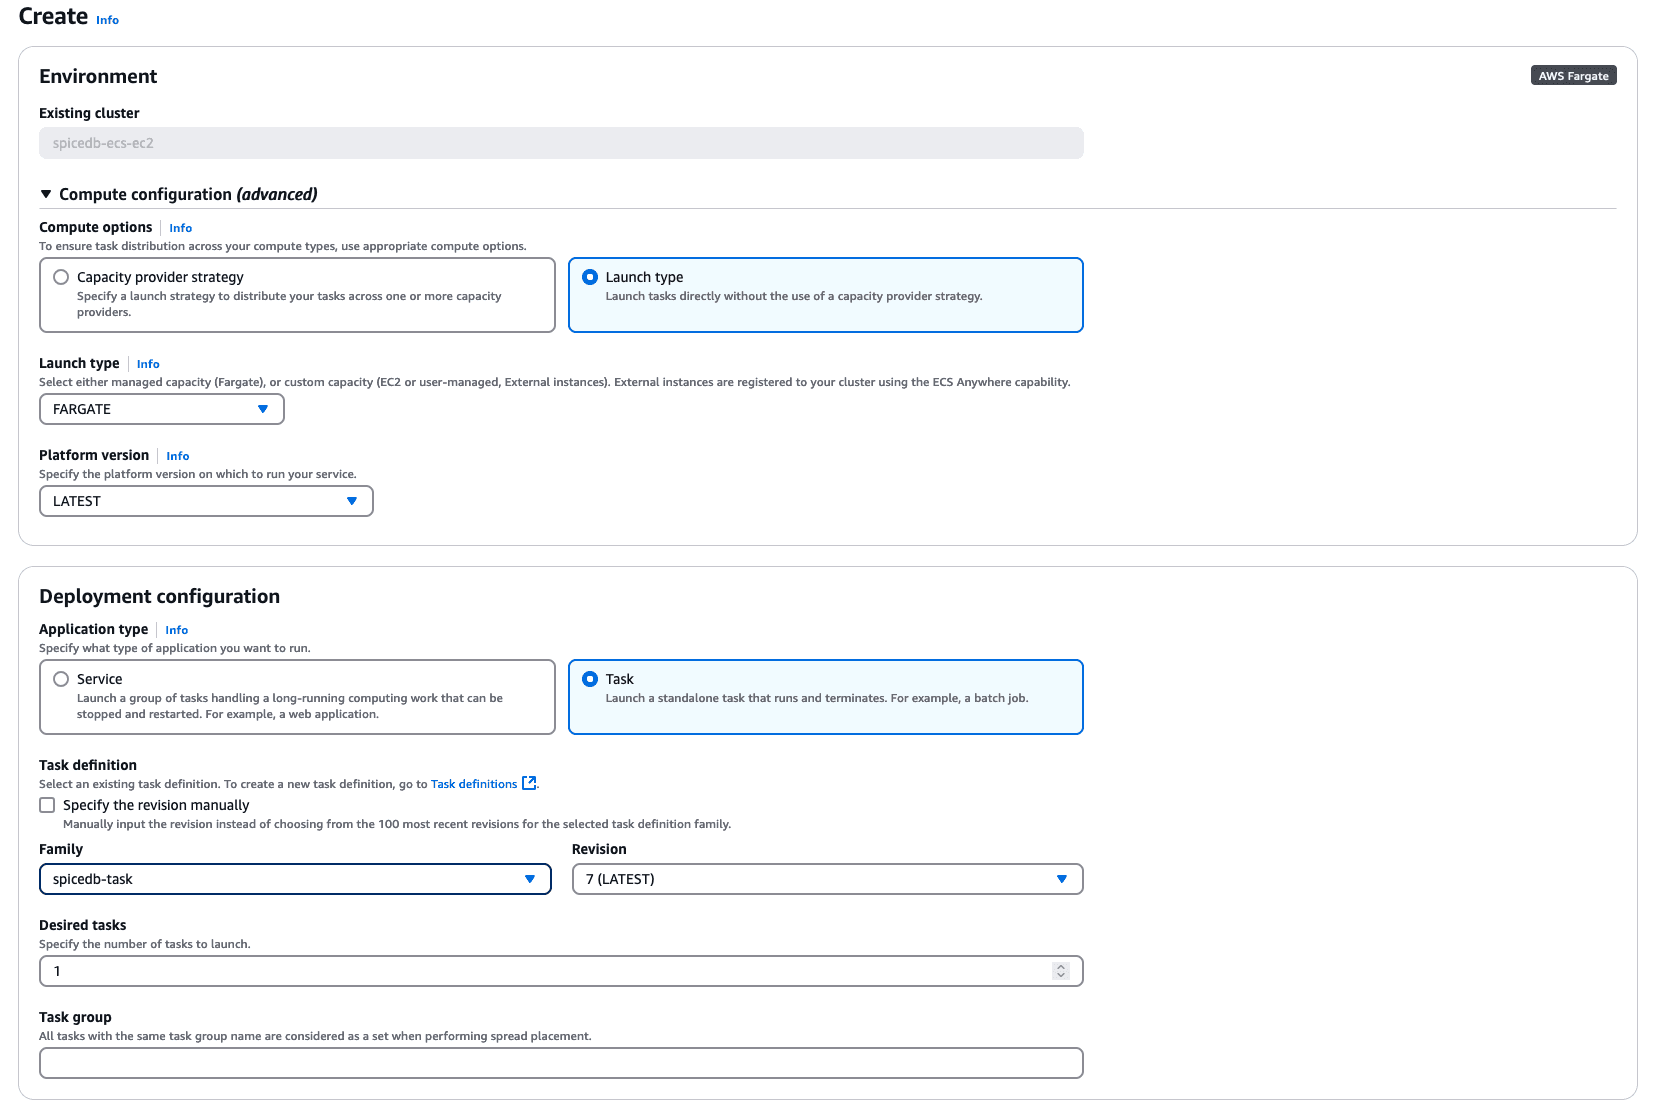
Now that we’ve defined a task, we can create a task that would run within your ECS cluster. Click on your ECS Cluster created earlier
- Click on the Tasks tab, and then Run new task
- Under Compute Configuration, click on Launch Type (since this is just a demo)
- Choose FARGATE as Launch Type and LATEST as Platform Version
- Under Deployment Configuration choose Task
- Under Task Definition, select the Task Definition you created previously and choose the LATEST revision
- You can specify 1 as the number of Desired tasks
- Under Networking, choose the appropriate VPC, Subnets and Security Groups. If you haven’t created these, go ahead and do so allowing traffic on the required ports (e.g., 50051 for gRPC, and 8443 for HTTP API if needed)
- Click ‘Create’ to create a task. This will show up as a Row under the Tasks tab
If all goes well, you can see the status of the Task as “Running”. Click on the task and then the Logs tab to see if SpiceDB is running on ECS. This is the output you should expect:
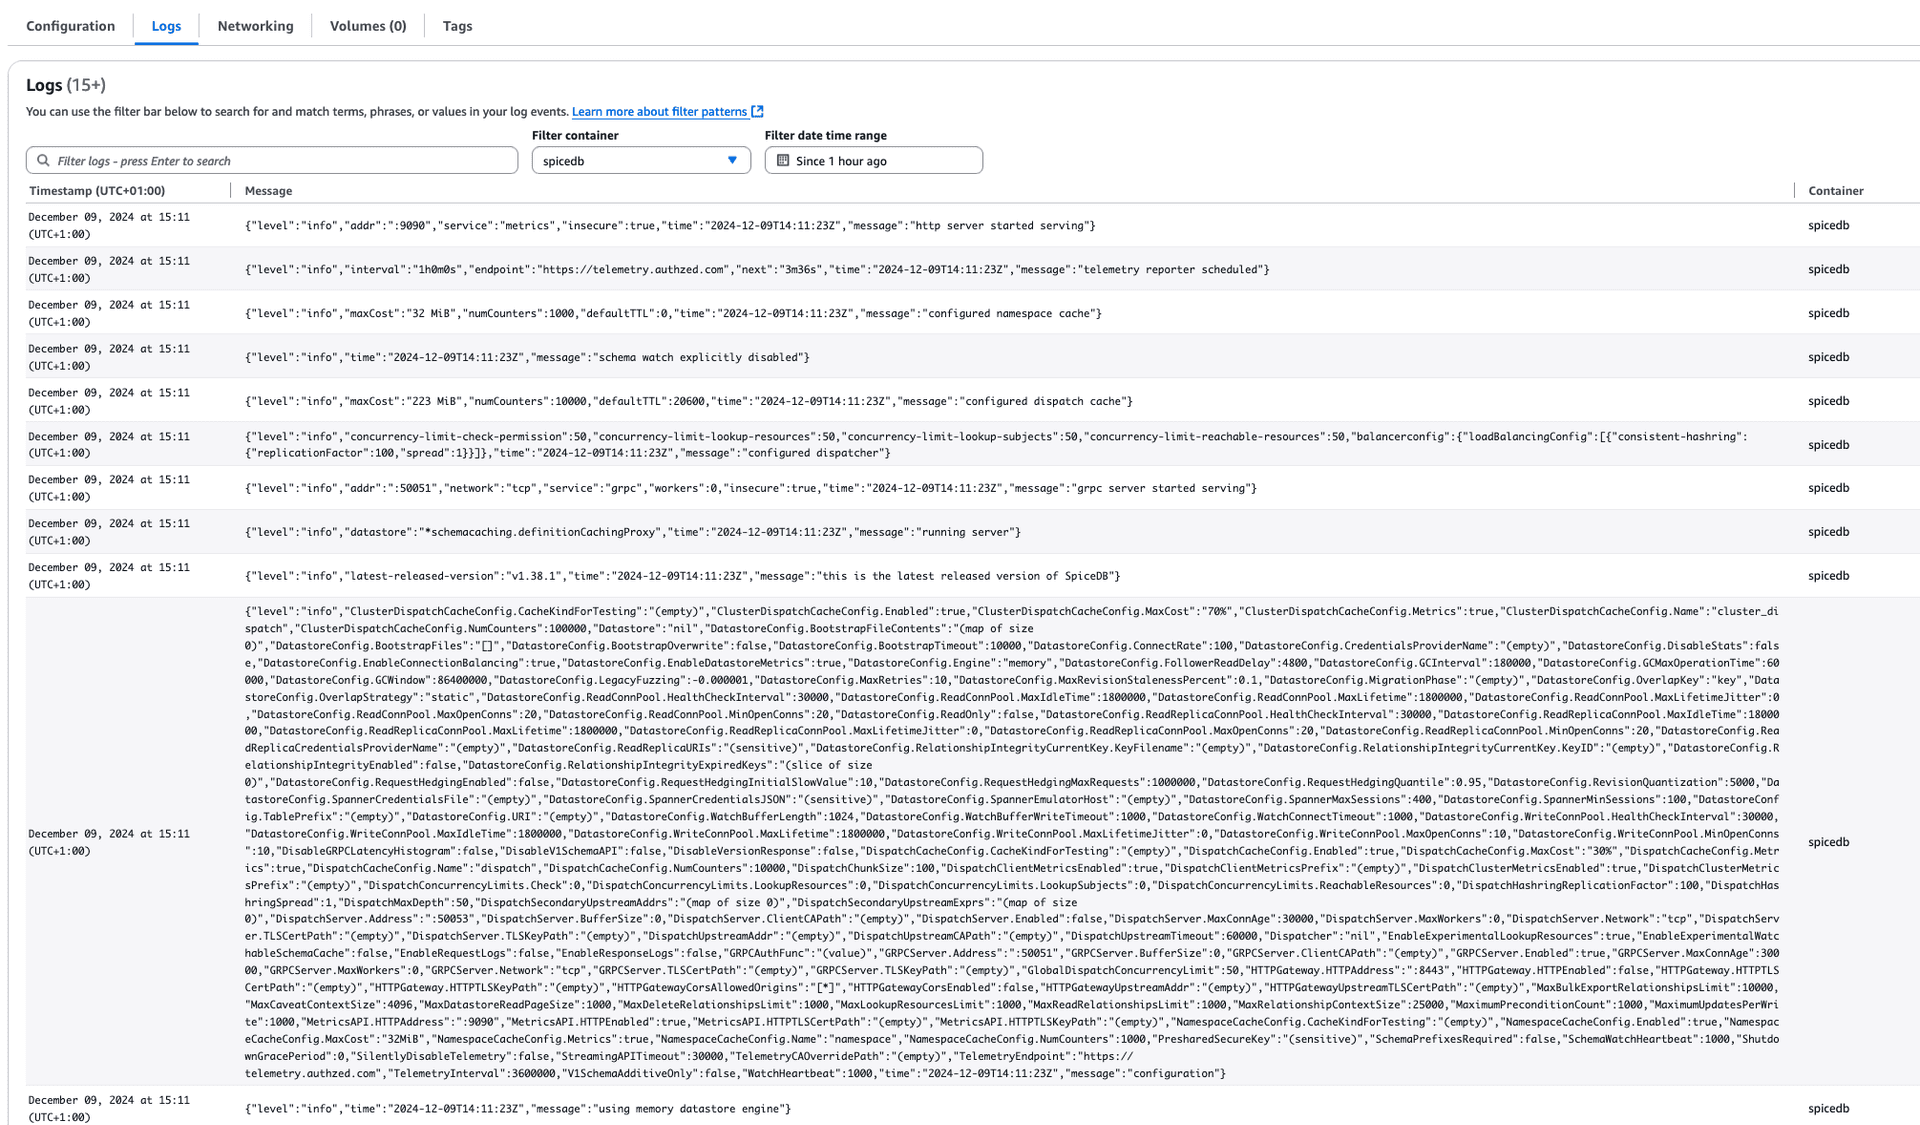
If there’s some error, check the logs for what could have gone wrong. Common errors include Access Permissions via IAM roles, and also VPC and Subnet rules.
Add schema and test permissions in SpiceDB
Let’s add a schema and permissions to the instance of SpiceDB running on ECS. The task you just successfully started has a Public IP address associated with it. This is what we’ll use to access SpiceDB
- Open the Task and click on the Networking tab.
- Copy the Public IP
- In your terminal set the current context in zed by typing:
zed context set spicedb-ecs <Public IP>:50051 somekey --insecure
where somekey is the key you specified in your task definition earlier. The insecure flag bypasses TLS handshake, again for our learning purposes.
Any commands via the zed CLI will interact with this instance of SpiceDB. Write a simple schema like so:
zed schema write <(cat << EOF
definition user {}
definition post {
    relation reader: user
    relation writer: user
    permission read = reader + writer
    permission write = writer
}
EOF
)
Store relationships based on this schema.
zed relationship create post:1 writer user:sid
zed relationship create post:1 reader user:lena
Check for permissions or lookup subjects using zed
zed permission check post:1 read user:lena
zed permission lookup-subjects post:1 read user
CloudFormation Template to Deploy SpiceDB to ECS
In production you want to rely on best practices such as using Infrastructure as Code, using a Load Balancer, securely storing Secrets, and using TLS.
Here’s a CloudFormation template that does just that. The template builds upon some of the steps mentioned in the guide above.
Create a Certificate Request
We need to request for an ACM certificate that can be used to establish secure communications access across the internet or within an internal network.
- Go to the AWS Console and open AWS Certificate Manager (ACM) and click the Request button
- Select Request a public certificate, and then enter the domain name. You can use wildcards for subdomains, Example: *.authzed.demo
- Choose a Validation method and Key algorithm and hit the Request button for the certificate
- Once created, create a record in your Route 53 Hosted Zone and wait for the status of the certificate to change to "Issued".
- Copy the ARN of the certificate.
Create a Secret for Authenticated Requests to SpiceDB
We need a preshared key to authenticate grpc requests. Here we manually create a key and store it in AWS Secrets Manager. (You can also do this programmatically)
- Go to AWS Secrets Manager and click on Store a new Secret, followed on Other type of secret
- Enter the key 'spicedb-pre-shared-key' and a super secret key in the value field.
- Give this key/value secret a name, use the default values and create a Secret.
CloudFormation Template
Here's a CloudFormation template to creates a ECS Cluster with a Service that is running SpiceDB. The Cluster is exposed via a Load Balancer and the datastore used is Postgres via Amazon RDS. Download the following YAML file:
The CloudFormation Template is here
Fill the missing values in the YAML file from the steps we've followed above.
- In your AWS Console, go to Amazon CloudFormation and click Create Stack
- Select Choose an existing template, and Upload a template file. Choose the YAML template file linked above.
- Enter the details. You can customize some parameters such as your subdomain name, ServiceName etc.
- Configure your stack options as required, and then click Submit to start the creation of the resources in the cloud.
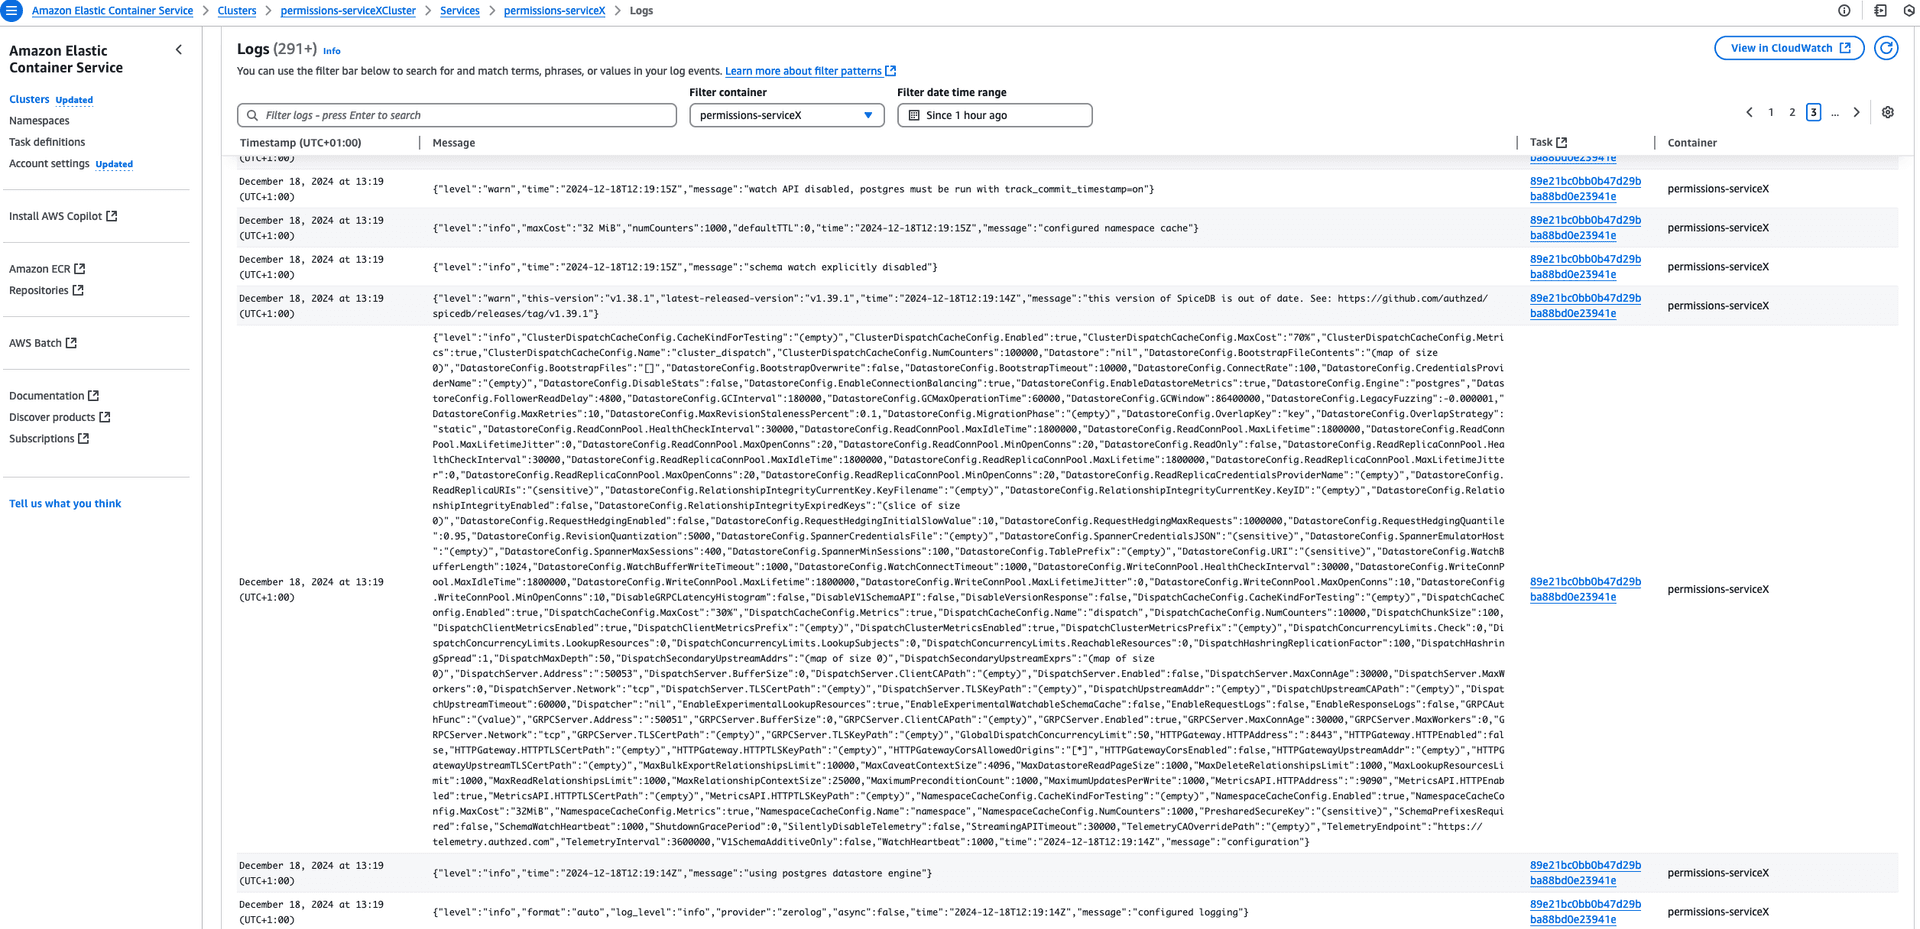
Once the CloudFormation stack has been created we can test it out. Click on the Outputs tab in the newly created CloudFormation stack and note the URL of the Load Balancer which is your endpoint. Head over to the ECS Cluster that has been created and open the Service that is running. Open the logs and should see SpiceDB in operation.
Run a Datastore Migration
Before using SpiceDB with a datastore, you need to run a migration with the spicedb migrate command. Read more about Migration here
Since this is a one-time command, we can modify the CloudFormation template to run a task or use the AWS CLI with the following command:
aws ecs run-task \
  --cluster <cluster-name> \
  --region <region-name> \
  --launch-type FARGATE \
  --network-configuration 'awsvpcConfiguration={subnets=[subnet-XX, subnet-XY],securityGroups=[sg-YX],assignPublicIp="ENABLED"}' \
  --overrides '{
      "containerOverrides": [
        {
          "name": "<container-name>",
          "command": ["migrate", "head", "--datastore-engine=postgres", "--datastore-conn-uri=postgres://<DBUser>:<DBPassword>>@<DBEndpoint:5432/<DBname>?sslmode=require"]
        }
      ]
    }' \
  --task-definition perms-stg-serviceTaskDefinition:1
If you run into errors relating to an unreachable Postgres instance, ensure that the Security Group attached to your RDS instance is setup to allow inbound traffic from the ECS task's Security Group or VPC subnet on port 5432.
Test Your Permissions
Follow the steps in the Add schema and test permissions in SpiceDB section above to test out your permissions system. Start with zed context set permissions <Load Balancer URL:50051> secretkey
Congrats! You've now deployed SpiceDB on Amazon ECS 🥳
Limitations of deploying SpiceDB on Amazon ECS
SpiceDB uses horizontal dispatch to maintain high cache hit rates. The main challenge with ECS is that SpiceDB nodes cannot easily discover each other out of the box, which is essential for horizontal dispatch to work. You could in theory use AWS Cloud Map for service discovery, but its DNS propagation delays may make it unsuitable for a mission-critical service with low latency requirements. The recommended deployment target for SpiceDB is Kubernetes so for AWS you could consider deploying to Amazon EKS instead.
This post was inspired by some of our Discord community members asking if we'd deployed SpiceDB on ECS. Come join our community in Discord and we'd be happy to answer any questions you have.

